Home Renovation and Home Building Education — TORONTO HOME BUILDING AND RENOVATION BLOG — BVM Homes

Home Renovation and Home Building Education

Is Spray Foam Worth It in a Toronto Home Addition? Where We Use It and Where We Do Not

TLDR: Yes, in the places where nothing else does the job: sloped roofs and cathedral ceilings, the underside of a cantilevered floor, beam and joist pockets, and the ducts that run through a cold attic. No, as the default for the whole house. On our current Toronto additions, Rockwool batts with a vapour barrier price at $4.00 to $5.00 per square foot of exterior wall. Spray foam on those same walls costs more to buy and more to install. Spray foam in a roof slope runs $9.60 to $10.30. And spray foam against a double brick wall is the one place we tell families no, because the wall needs to breathe. Everywhere else is fine, but you will be paying a premium.

What most homeowners get wrong: "spray foam everywhere"

Here is the request we hear a few times a year: spray foam everything, so the house is airtight. The logic is sound as far as it goes. Spray foam is an insulation and a vapour barrier in one product. It creates a really airtight assembly and prevents air leakage, usually better than batt insulation plus a separate vapour barrier.

Two things get missed.

The first is the installer. The air leakage difference comes down to the installers mostly. A batt and vapour barrier assembly that is installed properly, with the poly sealed at every penetration and the batts cut to fit rather than stuffed, can be very airtight as well. Spray foam covers for a careless crew. A careful crew gets there with batts.

The second is the house you already own. A home addition is built onto an existing structure, and that structure likely already has a lot of air leakage through the existing levels and assemblies. Paying a premium to make the new 1,000 square feet airtight while the original 1,500 square feet leaks the way it always has does not buy what the brochure says it buys.

Where spray foam earns its cost

Spray foam is normally used in the areas that are harder to complete any other way. On an addition that means four places.

Beam and joist pockets. Where a steel beam or the floor joists meet the exterior wall, the cavities are small, irregular and full of hardware. Batts cannot be cut to fit them and poly cannot be sealed around them. Spray foam fills the pocket and seals it in one pass. On our North York additions this line runs $7.50 per square foot at R-31, and a typical addition has a few hundred square feet of it.

Cantilevered floors. Cantilevered floor assemblies are popular in Toronto additions, and the underside of that floor is exposed to outside air. Spray foam is the standard answer there, and we have written about the cantilevered floor system before. On our Guildwood and North York additions the exposed floor and rim board sit in the same R-31 line as the joist pockets.

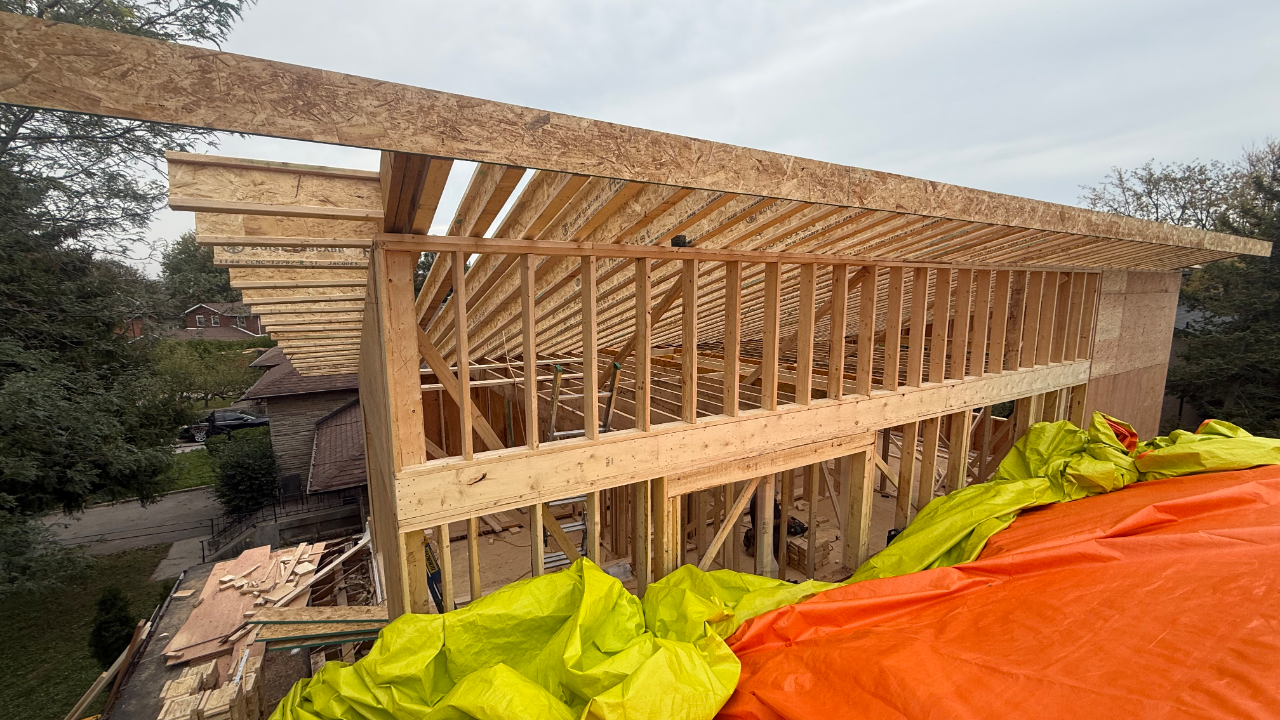
Sloped roofs and cathedral ceilings. A ceiling finished to the underside of the rafters has no attic above it, so the rafter bay has to carry the whole roof’s insulation. That is where closed-cell spray foam goes, and it is the most expensive line in the insulation budget: $10.28 per square foot on a North York slanted ceiling and knee wall, $9.61 on a garage ceiling in Guildwood. Both are R-36.

Ducts in unconditioned space. On a second-storey addition we often run the supply and return ducting through the attic, because that is how you heat the new rooms without bulkheads in the old ones. That attic is cold, so the ducts get sprayed. Our budgets carry it as a Building Code item rather than an upgrade, and it runs $3,500 to $4,000 as a lump on our current North York and Guildwood additions.

Where Rockwool does the job better

Exterior walls. Batt insulation, specifically Rockwool, is what we use for exterior wall assemblies on almost every addition. It costs less to buy and less to install than spray foam.

A 2x6 wall takes an R-22 Rockwool batt with a vapour barrier over it. Installed properly, that wall performs. On our current additions the Rockwool wall line prices at $4.00 per square foot in Guildwood, $4.38 in North York and East York, and $5.00 on a North York second storey.

Rockwool also has a second job on most of our projects: sound. Rockwool Safe’n’Sound goes into the joist cavities between floors and the walls between bedrooms, at $4 to $5 per square foot.

The numbers, from our own budgets

These are client prices from the budgets of BVM additions that are built or under construction, pulled in October 2026. They are what the homeowner pays, not what the material costs us. Estimates and unsigned proposals are left out.

  • 2x6 exterior wall, R-22, Rockwool batt + vapour barrier: $4.00 to $5.00

  • Joist pockets, rim board, cantilevered floor, R-31, Closed-cell spray foam: $7.50

  • Sloped roof, cathedral ceiling, garage ceiling, R-36, Closed-cell spray foam: $9.60 to $10.30

  • Joist cavities between floors, R-12 flash, Closed-cell spray foam: $3.70 to $4.00

  • Ducts in the attic, R-12, Closed-cell spray foam: $3,500 to $4,000 per job

On the walls, spray foam is a premium product at a premium price for an assembly that a good crew makes airtight with batts anyway. On 1,000 square feet of exterior wall, which is a normal second-storey addition, that premium adds up.

What a real hybrid looks like: our Guildwood addition carries $10,848 of Rockwool on 2,712 square feet of wall, and $6,813 of spray foam across the garage ceiling, the joist cavities and the attic ducts. A North York second storey with a long slanted ceiling flips it: $5,175 of Rockwool on the walls and $9,748 of spray foam, because the roof slope alone is 500 square feet of R-36. The roof shape sets the spray foam bill.

Where it goes wrong: spray foam on double brick

Much of Toronto’s older housing stock, from the Beaches to Bloor West, is double brick. Spray foam is not the best option against double brick wall assemblies because it does not provide the necessary amount of breathability that a double brick wall needs to properly function. Seal the inside face of that wall with foam and you have taken away the one thing it relies on. That is the one place in a house where "spray foam everywhere" does harm rather than just costing more.

So when we are recommending insulation for a project and a client is adamant about spray foam, we only focus on the areas where the spray foam will not negatively affect the assembly. The new framed walls of the addition, yes if they want to pay for it. The original masonry walls of the house, no.

The BVM approach: a hybrid, by assembly

We mostly do a hybrid between Rockwool and spray foam on our projects, to balance cost effectiveness with performance. The split is decided assembly by assembly on the drawings, before the budget goes to the client: Rockwool with a vapour barrier in every framed exterior wall, spray foam in the four places above, Rockwool Safe’n’Sound between floors and between bedrooms. Where the drawings call for continuous insulation on the outside of the wall, rigid foam board goes under the cladding, which is a separate line and a separate article.

The honest downside of our recommendation is that it puts more weight on the installer than the all-foam version does. "Installed properly" is our responsibility on site. A family that wants the product to carry that risk instead of the crew is making a reasonable choice, and some clients do want everything in spray foam to get a really airtight finish. On the new framed assemblies we will build it that way, and the budget will show the premium line by line.

What to ask any builder about insulation, and what a bad answer sounds like

Ask for the insulation lines in the budget by assembly: walls, roof, floors, ducts. A real budget has them split out with a product, an R-value and a square footage against each one.

A bad answer is "spray foam throughout" as a single line with a single price. It usually means the builder has not looked at the roof shape, has not asked whether the existing house is masonry, and is pricing a premium product by the house rather than by the assembly. The opposite is just as bad: a low "insulation allowance" with no product named, which is the batt price for everything, including the roof slope where batts cannot do the job.

Ask what goes against the original brick. If the answer is spray foam, ask how the wall is supposed to breathe.

Ask who installs the vapour barrier and who checks it before drywall. The answer tells you whether the builder understands that the batt assembly comes down to the installer.

Key takeaways

  • Spray foam is worth it in sloped roofs, cathedral ceilings, cantilevered floors, beam and joist pockets, and attic ducts. Those are hard to insulate any other way and the budget lines are $7.50 to $10.30 per square foot.

  • Rockwool batts with a vapour barrier handle the exterior walls at $4.00 to $5.00 per square foot on our current Toronto additions. Spray foam on the same walls costs more to buy and more to install.

  • A properly installed batt and poly assembly is very airtight. The difference comes down to the installers mostly.

  • Your addition is attached to an existing house that already leaks air. Airtightness in the new part only matters in proportion to the old part.

  • Never spray foam the inside of a double brick wall. It needs to breathe, and foam stops it.

  • The roof shape sets most of the spray foam bill. A long slanted ceiling can put more money into foam than into every wall combined.

Frequently asked questions

Is spray foam worth it for exterior walls on a Toronto addition?

Usually not. Rockwool batts with a sealed vapour barrier price at $4.00 to $5.00 per square foot on our current additions and make an airtight wall when installed properly. Spray foam on the same wall costs more. It is a reasonable upgrade if you want the product rather than the crew to carry the airtightness, and you pay the premium for it.

Can you spray foam the walls of an old Toronto brick house?

Not the inside face of a double brick wall. That wall dries to the inside, and closed-cell foam stops it. We limit spray foam to the new framed assemblies and the roof, floor and duct locations where it earns its cost.

How much does spray foam insulation cost per square foot in Toronto?

On our live addition budgets, closed-cell spray foam prices at $7.50 per square foot in joist pockets and exposed floors at R-31 and $9.60 to $10.30 in sloped roofs and ceilings at R-36. Attic ductwork runs $3,500 to $4,000 as a lump.

Get the insulation split before you get the drawings

We price insulation by assembly before a family commits to a design, because the roof shape they fall in love with is also the spray foam bill they will pay. The Home Addition Feasibility Report gives you the zoning, the budget and the timeline for your property first. Or book a free 30-minute discovery call and ask us where the foam goes on your house.

Book your 30-minute discovery call
Related reading

When Is a Home Addition the Wrong Call? Three Times We Tell Toronto Families Not to Build Yet

When Is a Home Addition the Wrong Call? Three Times We Tell Toronto Families Not to Build Yet

We tell a family not to build an addition, or not yet, in three situations. The budget is below what the scope needs and no amount of trimming closes the gap. The lot cannot take the addition without a zoning fight the family cannot wait out. Or the family needs to be back in the house in under 12 months.

Do We Both Need to Be on the Call with the Builder? Yes, and Here Is Why

Do We Both Need to Be on the Call with the Builder? Yes, and Here Is Why

We ask both partners to be on the first 30-minute discovery call, even when it is harder to book. We have not counted it yet, but since we started asking, families answer faster, gather what they need faster and spend less time working out the next step. Here is why, the one exception, and what to ask any builder.

Who We Are Not the Right Builder For (and Why We Say It on the First Call)

Who We Are Not the Right Builder For (and Why We Say It on the First Call)

We are the wrong home addition builder for some GTA families: anyone living in the house during the build, anyone who wants cost plus, anyone hiring on price alone, anyone who will not put the time into the scope, and anyone who will not work in our project software. Here is why we hold each line, and the questions to ask any builder before you sign.

What You Need to Know About Drywall, Tariffs and Price Increases

What You Need to Know About Drywall, Tariffs and Price Increases

New drywall tariffs hit October 1. On two Toronto additions we priced this month, the surcharge is zero. Here is the increase that actually costs you.

Fixed Price vs Cost Plus: Which Contract Actually Protects You

Fixed Price vs Cost Plus: Which Contract Actually Protects You

One contract pays your builder to plan properly, the other does not. A fixed-price Toronto builder on change orders, allowances, and who carries the risk.

Should You Hire Your Architect or Your Builder First?

TLDR: This is not an argument against hiring an architect first. It is an argument against having only an architect at the table. When drawings get finished in isolation and then shopped to builders, homeowners usually discover a large gap between the design they fell in love with and what it costs to build. The fix is not a different order of hiring. It is getting the whole project team involved early, and choosing an architect who wants that.

What Usually Happens

A homeowner hires an architect, works through a wishlist, arrives at a finished set of drawings, and only then starts talking to builders. It feels like the responsible order. Design first, price second.

The problem shows up in the first real conversation. Not all architects and architectural partners are built equally. Some care deeply about budget adherence. Others are more focused on getting you to sign the dotted line, and the same is true of builders. When we start working with a client whose architect is new to us, we try to understand every conversation had to date and get that architect into the room with us.

More often than not, whether the architect meant to or not, a set of questions is still sitting unanswered. How much site work has been done to date? Has shoring been accounted for, or even reviewed? Have the plans been looked at structurally to see whether there are opportunities for savings? What does the mechanical design involve, and what assumptions are being made?

None of those are unreasonable questions. All of them have to be answered before anyone can put an accurate scope of work together. This moment is also very telling, because it makes clear which clients actually understand their designs and which have been trusting their architect blindly. Sometimes that works out. Most of the time it ends in a massive gap between the dream and the reality of the construction budget.

What Most Homeowners Get Wrong

The mistake is not choosing the wrong architect. It is letting the design happen in a silo.Here is the pattern we see repeatedly. The design gets built around a wishlist. The plans are set up to be quoted right before the client is ready to submit for permit. The drawings then get shopped around to builders with varying levels of buy-in, because every builder knows they are one of three. The homeowner is inevitably drawn toward the lowest number, which is really the "let's take a chance" number, and they pay for it afterward in change orders, poor communication, and unkept promises.

By the time real pricing arrives, the drawings represent months of work and emotional investment. Changing them is expensive. Building them may not be possible.

Why a low bid at this stage is the most expensive outcome

A builder who is one of three bidders on a finished set of drawings has almost no incentive to flag problems. Flagging problems raises their number. The builder who says the least and prices the thinnest wins the job, then recovers the difference once construction is underway and the homeowner has nowhere else to go.

That is not a builder problem or an architect problem. It is a structural consequence of pricing a design that was never tested against cost while it was being drawn.

The BVM Approach

We get a design team involved because we know when to stay in our lane. Rather than pretending we have all of the right answers, we surround our clients with a project team who can take a project from concept through to completion.

A custom home needs architects, interior designers, structural engineers, mechanical and HVAC designers, and often geotechnical input, all rowing in the right direction. When everyone is at the table from the start and genuinely bought into making the project work, that is when the best outcomes happen.

On our larger projects, pre-construction runs in intensive sprints with the client and their architectural designer: budget build-outs, design reviews, scope adjustments, engineering consultations. Decisions like an insulation package upgrade or a zoned HVAC system get made with full information and real costs attached, not discovered later.

How the push and pull actually works

People assume an architect and a builder in the same room means conflict. In practice, money is the ultimate decision-maker, so most disagreements get resolved by looking at real numbers.

The architect works to fit in as many of the wishlist items and requirements as possible. The builder is constantly watching the cost implications. Done properly, that is an intricate push and pull that serves the client, because it holds function and form together inside a budget. It only works when there is a common mission, usually the client's budget or their overarching goals for the project. With genuine common ground, the friction stays productive.

The Honest Answer on Savings

We are often asked how much early involvement saves. We cannot give a clean number, and the reason matters.

We do not know what a client would have spent, because we were iterating on the plans the entire time. The scope never reached the danger area that forces a team to backtrack and hunt for savings, because we knew the budget constraints from day one. The saving does not show up as a line item. It shows up as a redesign that never had to happen.

What to Ask Before You Commit

If you have an architect in mind, or a builder, these questions tell you quickly whether the two will work well together:

  • Have they worked together before?

  • What does each of their pre-construction processes look like, and how similar are they?

  • Do they integrate other teams, and are they open to collaboration?

Understanding each team's pre-construction process is the part most homeowners skip. At BVM we have an integrated process between design and build that already works well together. When clients come to us with an architect already chosen, we make a point of understanding that architect's process and confirming it fits with ours.

An architect who welcomes a builder and other consultants early is the one you want. That openness matters more than the order of hiring.

If Your Drawings Are Already Finished

Find a builder. You are already behind, because finished drawings usually mean you are hoping to build soon, and every good builder has a lead time before they can start.

The most useful thing you can do right now is hold off on submitting those drawings for permit and focus squarely on identifying your builder. Permit submission locks in decisions that may need to change once real pricing arrives.

Key Takeaways

  • The problem is not hiring an architect first, it is having only an architect at the table

  • Drawings developed in isolation usually surface unanswered questions about site work, shoring, structure, and mechanical design

  • Shopping finished drawings to three builders selects for the thinnest number, not the best outcome

  • A custom home needs architects, interior designers, structural engineers, mechanical designers, and sometimes geotechnical input working together

  • Money resolves most design disagreements, which is why real numbers belong in the room during design

  • Ask whether your architect and builder have worked together, and whether their pre-construction processes fit

  • If your drawings are done, find your builder before you submit for permit

Frequently Asked Questions

Q: Should I hire a builder before an architect?
A: Not necessarily. What matters is that your builder and your wider project team are involved while the design is still moving, rather than after it is finished. An architect who welcomes that collaboration early is the right starting point.

Q: Will involving a builder during design limit my architect's creativity?
A: In our experience it does the opposite. The architect keeps pushing to fit the client's wishlist and requirements while the builder tracks cost implications, and that push and pull keeps ambitious ideas alive by keeping them affordable.

Q: I already have permit-ready drawings. What should I do?
A: Hold the permit submission and find your builder first. Good builders have lead times, and submitting locks in decisions that may need to change once you have real construction pricing.

Ready to Get Your Team in the Same Room?

If you are early in design, or holding a finished set of drawings and no builder, that is exactly the conversation to have with us before anything gets submitted. Book a consultation and we will walk through where your project actually stands.

Related Reading:

How to Find the Right Home Builder in Toronto (Without Getting Burned)

How to Find the Right Home Builder in Toronto (Without Getting Burned)

Toronto homeowners vent about bad builders on Reddit every week. Here's what to ask, what to watch for, and how BVM's pre-construction process protects your investment.

Move or Build in Toronto? Sometimes the Honest Answer Is Move

Move or Build in Toronto? Sometimes the Honest Answer Is Move

BVM Contracting sometimes tells Toronto families to move instead of build. Here’s why that honesty — not a sales pitch — has built our reputation over decades.

Toronto Building Permit Timeline: What's Really Eating Your Schedule

Toronto Building Permit Timeline: What's Really Eating Your Schedule

Toronto building permit timelines aren't just about the City. It's 6–10 months of planning before you submit. Here's what no one tells you upfront.

Committee of Adjustment Toronto: What Homeowners Actually Need to Know

Committee of Adjustment Toronto: What Homeowners Actually Need to Know

Your Toronto renovation triggered a variance. Now what? BVM explains the Committee of Adjustment process, costs, timelines, and how to actually get approved.

What Does a Home Builder Actually Do?

What Does a Home Builder Actually Do?

Wondering what a home builder really does? BVM Contracting breaks down trade coordination, pre-construction planning, and how the right builder protects your project.

Why Living Through a Renovation With Kids in Toronto Is a Bad Idea

Why Living Through a Renovation With Kids in Toronto Is a Bad Idea

Toronto families who live through major renovations with kids almost always regret it. Here's the honest truth from BVM Contracting — and what to do instead.

How to Compare Builder Quotes in Toronto Without Getting Played

How to Compare Builder Quotes in Toronto Without Getting Played

Three quotes, three very different numbers — but which is real? Learn how Toronto contractors low-ball and what BVM Contracting does differently to protect your budget.

Your Architect Doesn't Know What Your House Will Cost

Toronto architects design beautiful homes. But most have no idea what it'll cost to build them. Here's how to close the gap before it costs you thousands.

Tree Protection Considerations for Toronto Custom Homes

Tree Protection Considerations for Toronto Custom Homes

Toronto tree protection rules can cost homeowners $100K+ in fines. Learn TPZ requirements, permit steps, and how to plan your custom home build around protected trees.

Provisional Sums and Allowances: The Contract Traps Costing Toronto Homeowners Thousands

Provisional Sums and Allowances: The Contract Traps Costing Toronto Homeowners Thousands

Learn how provisional sums and contract allowances trap Toronto homeowners into budget overruns — and how BVM Contracting prevents it through full procurement before signing.

TRCA Regulations: What Toronto Homeowners Building Near Ravines Actually Need to Know

TRCA Regulations: What Toronto Homeowners Building Near Ravines Actually Need to Know

Building near a Toronto ravine? Learn how TRCA regulations affect your home build, real permit costs ($560–$2,840), timelines, and what most homeowners don’t know.

Ontario Home Renovation Savings Program: What Toronto Homeowners Actually Need to Know

Ontario Home Renovation Savings Program: What Toronto Homeowners Actually Need to Know

The Ontario Home Renovation Savings Program sounds like free money. Toronto homeowners, here's what actually happens when you dig past the marketing — from a contractor who's seen it firsthand.

Soundproofing in Toronto Multi-Unit Builds: What Most Contractors Miss

Soundproofing in Toronto Multi-Unit Builds: What Most Contractors Miss

Most Toronto multi-unit projects fail at soundproofing. We break down OBC requirements, real costs, and the #1 mistake multi-unit development projects make when considering soundproofing.